
DIY Embroidered Accessories open a world of customization that lets you wear, carry, and gift items uniquely crafted by your own hands. From embroidery on hats that sit just right on your head to embroidery on bags that show off your motifs, this craft blends creativity with practical skills. If you’re looking for a fulfilling home project that yields stylish results, this guide will walk you through the fundamentals of making DIY embroidery at home and launching simple home embroidery projects. You’ll discover beginner-friendly techniques, essential tools, design ideas, and step-by-step projects that are ideal for embroidery for beginners. By the end, you’ll feel confident choosing fabrics, stitches, and patterns that suit your style while also understanding how to care for your finished pieces.
Think of it as handcrafted textile embellishment that lets you tailor hats, bags, and small goods with personal motifs. This form of needlework blends speed and patience, combining simple stitches with hand embroidery at home to build texture, color, and eye-catching details. Conceptually, it sits alongside at-home stitching projects, fabric embellishment, and embroidery for beginners as you learn. By applying basic transfer methods, thread choices, and careful finishing, you create durable, stylish pieces you’ll wear or gift with pride.
DIY Embroidered Accessories: Getting Started at Home
DIY Embroidered Accessories open a world of customization that lets you wear, carry, and gift items uniquely crafted by your own hands. This introductory guide celebrates the joy of DIY embroidery at home, guiding you from first stitches to finished pieces that showcase your personality. If you’re new to this craft, you’ll discover how embroidery for beginners can grow into a relaxing, rewarding home embroidery project that yields stylish results.
Starting with the basics, you’ll learn to choose simple designs and practical projects that fit hats and bags, while keeping your workflow approachable and enjoyable. By focusing on essential tools, transfer methods, and clear step-by-step practices, you’ll gain confidence to tackle embroidery on hats, embroidery on bags, and other everyday items. The goal is to turn a simple piece of fabric into a thoughtful, handmade accessory you’re proud to wear or gift.
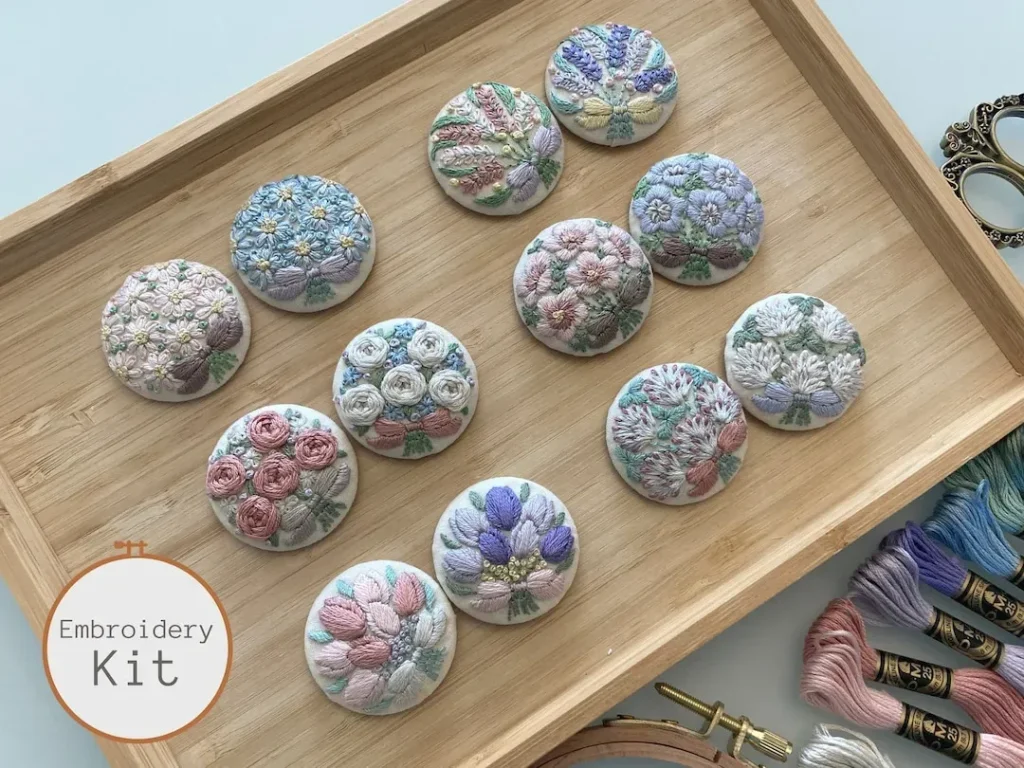
Tools and Setup for Embroidery at Home
A successful project begins with the right tools. For DIY embroidered accessories, assemble hoops of varying sizes, stabilizers, embroidery floss or cotton threads, needles, and fabric appropriate for hats or bags. These essentials lay the foundation for precise stitching and durable finishes, whether you’re practicing on scrap fabric or working on your first hat or bag.
If you prefer speed and consistency, you can explore DIY embroidery at home with a small embroidery machine. Machine embroidery can produce precise stitches and intricate patterns quickly, making it ideal for larger projects or multiple items. Regardless of whether you sew by hand or with a machine, a tidy workspace and organized transfer tools help you maintain tension, alignment, and a professional look throughout each project.
Selecting Fabrics, Stabilizers, and Design Transfer for Hats and Bags
Choosing fabric and stabilizers is critical for achieving durable, crisp results on hats and bags. Durable options like cotton twill, canvas, denim, or linen provide structure, while stabilizers such as tear-away or cut-away keep the design pressed flat and prevent distortion. The right combination ensures your embroidery holds up to wear and washing, whether you’re doing embroidery on hats or embroidery on bags.
Design transfer is a core step in bringing your ideas to life. Beginners often start with tracing, water-soluble markers, or transfer papers to position designs accurately. Freehand drawing is another option, but starting with simple shapes or monograms helps you build confidence before attempting more complex floral motifs or scenes. Adapting transfer methods for hats and bags is all about choosing methods that wash away cleanly and leave minimal marks after finishing.
Stitches and Techniques for Beginners in Hats and Bags
Understanding basic stitches unlocks countless embroidery possibilities. Start with running stitch for outlines, backstitch for clean lines, satin stitch for solid color fills, and a few texture stitches like the French knot or split stitch to add detail. These beginner-friendly stitches are well suited to both hats and bags, letting you experiment with color blocking and simple motifs.
As you gain comfort, you can explore shading and layering by combining stitches and adjusting thread counts. Planning color palettes in advance helps ensure harmony across a project, whether you’re practicing on scrap fabric or stitching a simple motif on a bag. With time, you’ll be able to tackle more complex shapes, while still keeping the process approachable for embroidery for beginners.
Practical Projects: Hats, Bags, and Small Accessories
Embroidery projects for hats and bags offer practical, portable ways to apply your new skills. Start with embroidered hats featuring a small geometric motif or flower, using a stabilizer to keep stitches crisp and a satin fill to achieve bold color blocks. Embroidered bags can showcase a large central motif or repeating patterns along the sides, making everyday items feel custom and unique.
Small accessories like pouches, keychains, and zipper pulls are perfect for practice and quick wins. Patches and appliques provide easy customization for hats or bags, while monograms on wallets or makeup bags offer thoughtful, handmade gifts. These projects demonstrate how embroidery fits into home embroidery projects and how you can grow from simple designs to personal, wearable art.
Care, Troubleshooting, and Personalization Beyond the Basics
Care and maintenance help your embroidered accessories last longer. Handwash delicate pieces in cold water or use a gentle machine cycle, turn garments inside out to protect stitching, and air dry to prevent distortion. Storing hats and bags in a cool, dry place also helps preserve colors and fabric integrity.
As you gain experience, push your creativity with mixed stitches, metallic threads, or beads to add subtle shine and texture. You can pair embroidery with other adornments like patches or fabric painting to create truly unique DIY embroidered accessories. Whether you’re pursuing DIY embroidery at home as a hobby or a practical way to tailor gifts, these advanced ideas can elevate your projects and expand your repertoire.
Frequently Asked Questions
What are DIY Embroidered Accessories and why are they ideal for embroidery for beginners?
DIY Embroidered Accessories are custom items, such as hats and bags, enhanced with hand or machine embroidery. They’re an excellent starting point for embroidery for beginners because you can start with simple designs, practice basic stitches, and gradually build confidence before moving to more complex motifs.
How can I start DIY embroidery at home for hats and bags?
To begin DIY embroidery at home, choose a simple design, gather essential tools, and prepare your fabric. Hoop the fabric with stabilizer, transfer your pattern, and stitch using beginner-friendly stitches, then finish and care for the piece. You can do this with hand embroidery or a compatible machine for faster results.
What basic tools do I need for embroidery on hats and embroidery on bags when making DIY Embroidered Accessories?
Key tools include embroidery hoops, stabilizers, embroidery floss or cotton threads, needles, fabric and interfacing, transfer tools, scissors, and measuring tools. Stabilizers prevent puckering, while the right fabric (canvas, denim, or cotton) provides structure for hats and bags.
Which basic stitches should I learn first for home embroidery projects?
Start with essential stitches like running stitch, backstitch, and satin stitch for solid fills, plus split stitch or French knots for texture. These basics are versatile for various DIY Embroidered Accessories and help you handle hats, bags, and patches with confidence.
How do I transfer designs for embroidery on hats or bags in the DIY Embroidered Accessories process?
Transfer designs using water-soluble pens, graphite tracing, or heat-erasable markers. You can freehand simple shapes or print patterns onto transfer paper. For beginners, start with easy shapes and check alignment before stitching.
What care tips help DIY embroidered accessories last longer?
Care for embroidered hats, bags, and other DIY Embroidered Accessories by handwashing delicate items in cold water or using a gentle cycle, turning inner side out, and air drying. Store items in a cool, dry place, and consider a light fabric sealant to reduce snagging on wear.
| Topic | Key Points |
|---|---|
| Introduction |
|
| Why Choose DIY Embroidered Accessories? |
|
| Tools, Materials, and Setup |
|
| Basic Stitches and Techniques |
|
| Choosing Fabric and Design |
|
| Design Transfer & Planning |
|
| Project Ideas |
|
| Step-by-Step: Hat Project |
|
| Step-by-Step: Bag Project |
|
| Tips for Success |
|
| Care and Maintenance |
|
| Advanced Ideas & Personalization |
|
| Common Challenges & Troubleshooting |
|
Summary
Conclusion: This overview highlights how DIY Embroidered Accessories can transform everyday items into personalized, handmade pieces through simple tools, beginner-friendly stitches, and practical project ideas. With basic guidance on fabrics, transfers, and finishing, beginners can build confidence and expand to more complex designs over time. The journey from hats to bags to small accessories combines creativity with technique, resulting in wardrobe-friendly gifts and personal keepsakes. Embrace the process, and you’ll continually grow your skills while enjoying the tactile satisfaction of handmade embroidery.